Automagically execute SQL using ADM
In this tutorial, you will automagically execute SQL on Snowflake. Let’s get started!
I’m a big fan of the AAA-method known from unit testing. This method also works well for tutorials I believe:
-
Before any tuturial can explain how to perform a certain task, we need to make sure that all prerequisites are met. This is called the Arrange step.
-
Next, we will perform the task, called the Act step.
-
Finally, we need to verify the result, which is referred to as the Assert step.
Arrange
-
Have a basic ADM-setup on your Git-repo using for example this guide: How-to: setup Gitlab repository
-
The basic setup should contain a Templater step and an Executer step. These steps will pop-up in the CI/CD-overview as the icons below.
If you your CI/CD pipeline looks like the one below, you’re good to go!

Act: Manual SQL execution
Personally, I like to first perform a task manually before automating it. I follow this preference also in this tutorial. First, I explain the steps to manually create a user. When all goes succesful, we continue to perform the same task automatically.
A working SQL-example
Let’s create a simple SQL-script that we know that Snowflake is able to execute.
-
First, login to your Snowflake-account.
-
Second, execute the following SQL to create a user called SNOWFLAKE_USER.
USE ROLE                  IDENTIFIER('SECURITYADMIN');
CREATE USER IF NOT EXISTS IDENTIFIER('SNOWFLAKE_USER')
  PASSWORD             = '****'
  MUST_CHANGE_PASSWORD = FALSE
;| Ensure that your Snowflake user is granted the role SECURITYADMIN. If not, Snowflake will return a Not-Authorized-Exception. |
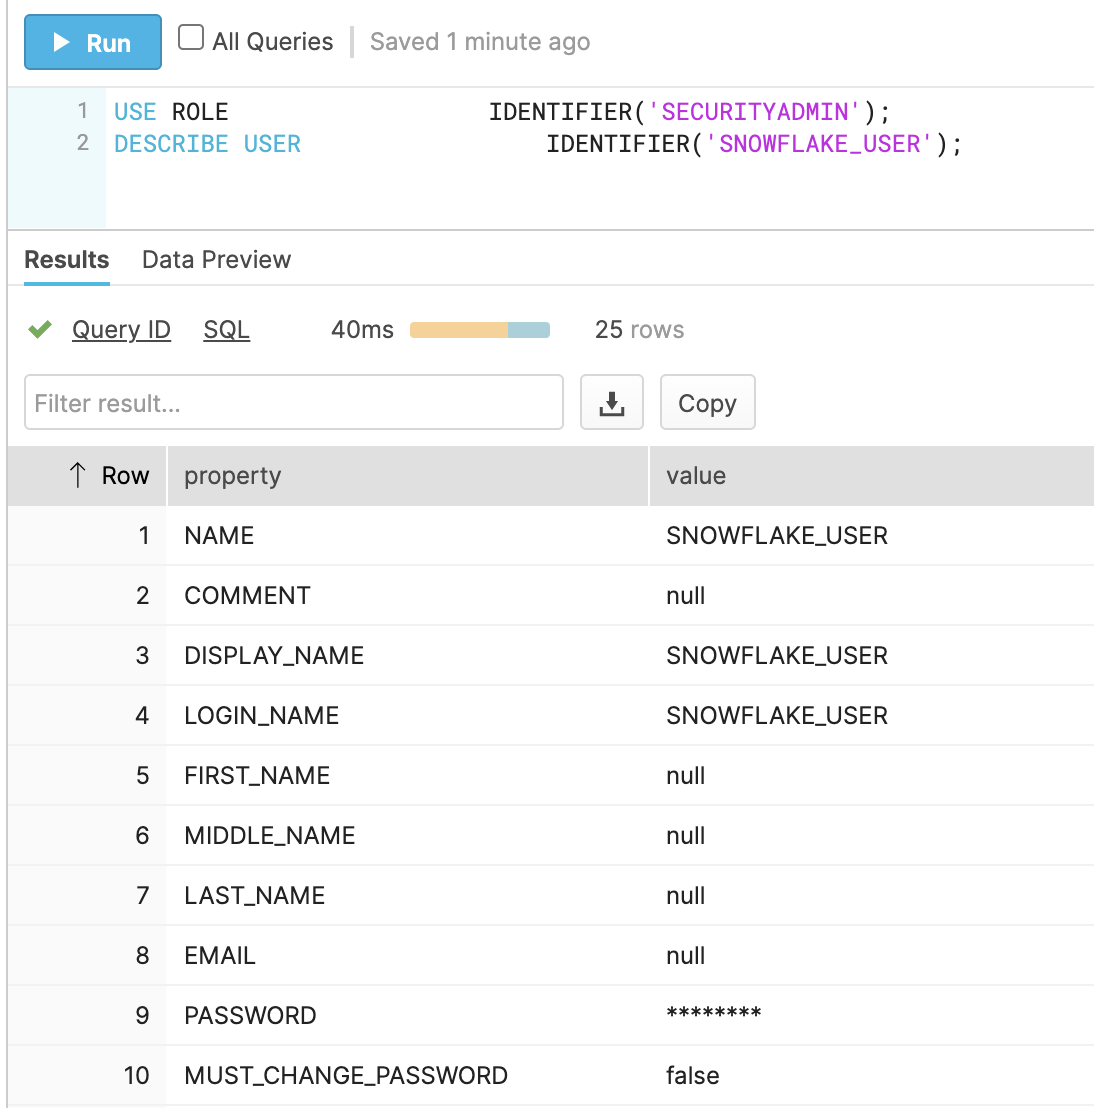
Verify that the user is succesfully created by executing the following code: .This snippet describes the user SNOWFLAKE_USER
USE ROLE        IDENTIFIER('SECURITYADMIN');
DESCRIBE USER   IDENTIFIER('SNOWFLAKE_USER');
Snowflake will return a result similar to the following screen-capture:
Act: Automatic SQL execution
Add the following contents to a file called create_user_SNOWFLAKE_USER.sql and add this file to the input directory.
/**
 * The following script will create user SNOWFLAKE_USER
 */

/**
 * ARRANGE
 * In order to create user, the SECURITYADMIN role is required.
 */
USE ROLE                  IDENTIFIER('SECURITYADMIN');

/**
 * ACT
 * Create the user
 */
USE ROLE                  IDENTIFIER('SECURITYADMIN');
CREATE USER IF NOT EXISTS IDENTIFIER('SNOWFLAKE_USER')
  PASSWORD             = '****'
  MUST_CHANGE_PASSWORD = FALSE
  DEFAULT_ROLE         = 'PUBLIC'
  DEFAULT_WAREHOUSE    = NULL
;
/**
 * ASSERT
 * Verify that the user exists in Snowflake by asking a description.
 * When this script fails, Snowflake does not know the user.
 */
USE ROLE                  IDENTIFIER('SECURITYADMIN');
DESCRIBE USER             IDENTIFIER('SNOWFLAKE_USER');
Verify that your repo contains the following files:
.
├── .gitlab-ci.yml (1)
├── environments (2)
│   ├── my-environment.yml (3)
│   └── license.yml.enc (4)
└── input (5)
└── create_user_SNOWFLAKE_USER.sql (6)| 1 | Holds the CI/CD configuration including the Templater and the Execution-step that we like to execute. |
| 2 | Folder that holds environment-configurations and the ADM-license. |
| 3 | Holds all configurations to execute towards the environment 'my-environment'. |
| 4 | A valid ADM-license. |
| 5 | Holds input files that should be used by one of the ADM-steps. |
| 6 | The file we previously created with the following contents. |
$ git add input/*

$ git status

On branch master
Your branch is up to date with 'origin/master'.

Changes to be committed:
  (use "git restore --staged <file>..." to unstage)
        new file:   input/create_user_SNOWFLAKE_USER.sql

$ git commit -m "Add user SNOWFLAKE_USER"

$ git push origin master

Enumerating objects: 5, done.
Counting objects: 100% (5/5), done.
Delta compression using up to 8 threads
Compressing objects: 100% (4/4), done.
Writing objects: 100% (4/4), 508 bytes | 508.00 KiB/s, done.
Total 4 (delta 1), reused 0 (delta 0)
To gitlab.com:acheron-it/demo/adm-documentation-repo.git
   1a46094..150ddad  master -> master
After the pipeline had run succesfully, you need to update your git-repo. You will download the output of the template-step and the execution-step:
$ git pull origin master.
├── README.md
├── environments
│ ├── my-environment.yml
│ └── license.yml.enc
├── input
│ └── create_user_snowflake.sql
├── logs
└── logs-my-environment
│ └── 1_create_warehouses
├── output
│ └── 1_create_warehouses
└── templates
└── create_warehouse.sql.j2